Welcome

Stone Revival Historical Preservation specializes in the preservation and restoration of historic masonry found in cemeteries, monuments and memorials.

One marker, a family plot or an entire cemetery. Whatever your needs, we’re here for you.

Stone Revival Historical Preservation is a Veteran Owned Business.

We are based in Indianapolis, Indiana and provide services throughout the continental United States:

Ethics and Standards of Practice

We use methods recommended by the Association for Gravestone Studies, the National Center for Preservation Technology and Training, Chicora Foundation and others.

More on preservation ethics.

We endorse the following Codes of Ethics and Guidelines and Standards for Practice:

AIC Code of Ethics and Guidelines for Practice

National Park Service: Standards for Preservation

National Center for Preservation Technology & Training

The Venice Charter

Chicora Foundation

You can contact Stone Revival Historical Preservation via email at brad@stonerevivalhp.com.

Aluminum vs. Wooden Tripods: Why Wood Has No Place in Monument Lifting

When establishing a rigging system to lift, move, and reset heavy historic headstones, socket bases, or multi-piece monument dies, your choice of tripod material is a matter of absolute worksite safety. While traditional wood has a storied history in early stonecraft, wood is never appropriate for modern monument lifting. It’s a matter of safety to person and artifact.

Professional stone preservation demands predictable material integrity, certified load capacities, and absolute structural reliability—standards that timber simply cannot guarantee under the extreme, concentrated compressive stress of dead-weight monument rigging.

Key Comparisons

FeatureAluminum TripodsWooden Tripods (Ash, Hickory, or Oak)
Structural ReliabilityEngineered with certified Working Load Limits (WLL) and uniform structural aluminum alloy tubing.Unreliable: Prone to internal rot, hidden micro-fissures, moisture swelling, and dry rot that can cause catastrophic, unannounced failure.
Safety MarginsPredictable load distribution with engineered yield strengths that eliminate guesswork.Highly variable grain structure; prone to sudden, explosive failure under shock loads or off-center pulls.
Weight & PortabilityLightweight; exceptionally easy to transport into remote, overgrown, or hillside cemetery sections.Heavier and bulkier, adding unnecessary physical fatigue when navigating rough, uneven historic turf.
Weather & AgingRust-resistant and dimensionally stable in all weather conditions, requiring minimal upkeep.Highly susceptible to moisture absorption, warping, splintering, and structural degradation over time.
Surface ImpactEngineered metal feet provide stable anchoring without splintering or collapsing under foot pressure.Vulnerable to crushing at joint points, pin holes, and leg bases under heavy multi-hundred-pound compressive loads.

Critical Safety Hazards of Wood in Rigging

Suspending hundreds—or thousands—of pounds of heavy stone over an open pit or delicate foundation leaves zero room for structural failure. Relying on wooden tripods introduces severe, hidden safety risks:

  1. Catastrophic Splitting Along the Grain: Under heavy compressive loads or slight off-center shifts (which naturally occur when breaking the suction of a deeply sunken base or shifting an uneven die stone), timber can split explosively along the grain without warning, instantly dropping the load.
  2. Hidden Internal Degradation and Rot: Unlike metal, which shows visible surface wear, wood can rot from the inside out, retain unseen moisture, or develop internal stress fractures hidden beneath paint, varnish, or weathered outer grains. A wooden leg that held a load last season may possess zero structural core strength today.
  3. Moisture and Climate Vulnerability: Cemetery work exposes tools to morning dew, rain, and muddy ground. As wood absorbs and releases moisture, it swells, warps, and loses its structural integrity. This makes a wooden tripod dangerously unpredictable from one job to the next.
  4. Crushing at Joints and Hardware Points: The extreme point loads generated by steel bolts, pins, and clevises place immense stress on wood. Over time, bolt holes elongate, and the timber fibers crush under pressure, leading to sudden joint slip or connection shear while under tension.

Why Aluminum is the Only Safe Choice

For professional preservationists, safety, compliance, and precision are paramount. Aluminum tripods eliminate the hazardous guesswork associated with organic materials.

  • Certified Load Ratings: Modern aluminum rigging tripods are manufactured to strict structural specifications, providing transparent, engineered safety margins and working load limits.
  • Dimensional Stability: Aluminum does not warp, absorb water, or rot. It maintains its structural geometry and strength year after year, regardless of field conditions.
  • Predictable Performance: Aluminum bends or flexes predictably under extreme duress rather than snapping explosively, giving operators vital warning signs if a load becomes dangerously unbalanced.

Final Verdict

Traditional wood belongs in the workshop, on historical displays, or used for non-load-bearing applications—not on the rigging line. When lives, safety, and irreplaceable historic stones are on the line, modern, certified aluminum tripods are the only responsible, professional choice for monument lifting and resetting.

Clarifying Misconceptions: The Use of Wet & Forget in Historic Headstone Conservation

Discussions within the cemetery preservation community have featured inaccurate claims regarding the suitability of Wet & Forget for cleaning historic headstones, often citing a study conducted by the National Center for Preservation Technology and Training (NCPTT). A closer examination of the facts reveals important distinctions regarding product formulations, study parameters, and cost-effectiveness.

1. Clarifying the NCPTT Study Finding

Critics frequently cite the NCPTT study to argue against using alternatives to D/2 Biological Solution. However, several critical details are often misrepresented:

  • Product Exclusion: Wet & Forget was not tested in the NCPTT study primarily because it was not commercially available at the time of the research. (Prosoco’s ReVive, formerly known as BioWash, was similarly omitted.)
  • Broad Applicability: The study did not mandate D/2 Biological Solution as the only appropriate cleaner. Rather, it concluded that products containing quaternary ammonium compounds are suitable for biological removal.

2. Chemical Composition and pH Balance

When selecting a biocidal cleaner for historic stone, professionals generally look for a pH level as close to neutral as possible to minimize potential long-term adverse reactions:

  • Neutral Baseline: Pure water has a neutral pH of 7.0.
  • Wet & Forget: Features a pH range of 7.5 to 8.0, making it slightly alkaline.
  • D/2 Biological Solution: Features a pH range of 9.0 to 10.2, making it moderately alkaline.

In terms of pH proximity to neutral, Wet & Forget offers a very favorable profile. Furthermore, long-term practical field testing over several years has shown no apparent chemical damage to stone substrates, with performance results comparable to both D/2 Biological Solution and Prosoco ReVive.

3. Economic Practicality and Accessibility

Some opposition to readily available retail products stems from a traditionalist mindset that equates commercial availability with lower quality. However, from a practical standpoint, project budgeting requires evaluating cost-efficiency, particularly for volunteer organizations or small-scale preservationists:

  • D/2 Biological Solution: Retails for approximately $50 per gallon. It is sold ready-to-use and is generally not diluted.
  • Wet & Forget Outdoor: Retails for approximately $30 per gallon as a concentrate. One gallon yields six gallons of usable cleaning solution.

To achieve six gallons of working solution, the comparative costs are stark: approximately $300+ for D/2 versus $30 for Wet & Forget.

Conclusion

Wet & Forget, D/2 Biological Solution, and Prosoco ReVive are all viable, effective products for removing biological staining on historic grave markers. When choosing between them, preservationists can confidently consider factors such as formulation chemistry, practical performance, and budget without compromising conservation standards.

The Gentle Revival: Using Intermittent Water Misting for Historic Headstone Conservation

In the field of historic cemetery preservation, the guiding philosophy is absolute: do no harm. For decades, well-intentioned caretakers and volunteers made the mistake of using harsh mechanical scrubbing, pressure washers, or abrasive wire brushes on weathered stones, causing irreversible damage to fragile carvings, tool marks, and stone faces.

Today, professional conservators rely on passive, non-destructive cleaning techniques. While this method is invaluable for addressing stubborn atmospheric pollutant crusts, intermittent water misting can also be deployed for many different cleaning issues when a marker is simply too fragile to clean by hand.

1. Understanding Gypsum Crusts and Carbon Staining

Before exploring treatment methods, it is essential to understand what gypsum crusts are and how they form on historic monuments.

  • The Chemical Reaction: Gypsum crusts develop primarily on calcium-rich stones like limestone and marble. When atmospheric sulfur dioxide ($\text{SO}_2$)—emitted from industrial burning, coal smoke, and urban pollution—interacts with moisture in the air, it forms sulfuric acid. This acid reacts chemically with the calcium carbonate {CaCO} in the stone, converting the outer mineral layer into gypsum {CaSO}.
  • The Role of Carbon: As this fragile gypsum matrix forms on the surface, it acts as a sticky trap for airborne soot, dust, and carbon particulates. Over decades, this combination bakes and hardens into a dense, disfiguring black crust.
  • The Structural Danger: Because gypsum occupies a larger volume than the original stone minerals it replaces, and because it traps moisture and pollutants beneath its hard exterior shell, it creates immense internal stress. When these chemical crusts interact with stones prone to structural vulnerabilities—classified as an inherent vice due to natural bedding planes, mineral banding, or internal weaknesses—the monument becomes highly susceptible to fracturing and surface loss.

2. What is Intermittent Water Misting?

Intermittent water misting is a controlled, low-pressure conservation technique designed to soften hardened surface crusts or surface soils without saturating the stone or exerting mechanical stress on fragile substrates. Rather than blasting a monument with a high-pressure hose or aggressively scrubbing with stiff bristles, a fine, atomized mist of water is applied to the stone periodically over an extended period.

This controlled hydration softens the dense buildup. By keeping the wetting intermittent, contaminants and crusts are allowed to gradually swell, loosen, and safely release their grip on the stone face through gentle softening phases and minimal rinsing—making it an ideal technique when a marker is too compromised for standard physical cleaning.

3. Why Aggressive Cleaning Fails Vulnerable Stones

Using high-pressure water or aggressive physical friction to remove carbon staining, biological films, or grime triggers immediate issues on fragile markers:

  • Accelerated Delamination: High-pressure water forces its way into microscopic bedding planes beneath or around the crust, driving sheets of stone apart like pages in a book.
  • Surface Erosion: Stiff bristles and metal scrapers scour away the soft outer skin of the stone beneath the staining, destroying subtle hand-chiseled lettering and tool marks forever.
  • Aggravated Spalling: Hardened crusts act as a dense, impermeable shell that traps moisture underneath. When physical stress or aggressive scraping is applied to these tensioned surfaces, the outer face of the stone shears away completely.

4. The Science and Benefits of Misting for Delicate Markers

Intermittent misting works in harmony with the physical and chemical properties of the stone and surface accumulations:

  • Controlled Hydration: By applying a fine, intermittent mist, moisture slowly penetrates surface layers or hardened matrices without flooding the stone’s interior pore network, preventing dangerous internal hydrostatic pressures.
  • Safe Softening Without Scraping: Repeated cycles of misting allow water to migrate behind and through micro-fissures, softening stubborn bonds so contaminants can be eased away safely without abrasive friction. This passive approach provides a vital alternative whenever a marker is too fragile to withstand cleaning by hand.
  • Preservation of the Stone Skin: By eliminating the need for physical scraping or harsh chemical stripping, the original tool patinas and historic surfaces remain completely undisturbed.

5. Best Practices for Implementing Misting Treatments

When planning a misting regimen for carbon-stained, gypsum-crusted, or exceptionally delicate markers, proper execution ensures optimal safety for the artifact:

  • Assess the Stone First: Always evaluate the condition of the marker. If a stone is actively delaminating, severely spalling, or suffering from advanced structural breakdown, consult a professional conservator before introducing any moisture.
  • Monitor Weather Conditions: Avoid misting or cleaning stones during freezing temperatures. Trapped moisture undergoing freeze-thaw cycles will generate internal pressure and cause spalling.
  • Combine with Gentle Softening Tools: Allow the misted surface to soften over time. Follow up with low-pressure water rinses or very soft, natural-bristle horsehair brushes only when the buildup has fully surrendered its bond—and bypass brushing entirely if the stone remains too fragile.
  • Maintain Detailed Records: Keep thorough logs of all cleaning protocols, exposure times, and dates of maintenance to track the long-term health and stability of the historic markers.

Understanding Stone Delamination and Spalling in Historic Grave Markers

Historic cemeteries serve as open-air archives, but the stone markers within them are subject to relentless environmental decay. Among the most destructive structural failures facing historic headstones are delamination and spalling. In conservation science, these types of structural vulnerabilities are frequently classified as an inherent vice—an internal flaw or material characteristic that naturally predisposes an artifact to self-destruction over time, regardless of how well it is treated.

While delamination and spalling are sometimes used interchangeably, they describe distinct mechanical breakdowns that can rapidly obliterate hand-carved inscriptions and fracture irreplaceable monuments.

1. Defining Delamination vs. Spalling

  • Delamination: This is the separation of stone along its natural internal layers or bedding planes. It is especially common in sedimentary rocks like sandstone (often called brownstone) and metamorphic stones like slate. Because these materials were formed through the accumulation of compressed mineral layers over millennia, moisture and weathering exploit microscopic gaps between these planes, causing sheets of stone to peel away like pages in a book. This form of degradation is a textbook example of inherent vice, rooted directly in the stone’s geological formation and mineral banding.
  • Spalling: Spalling refers to the breaking away, chipping, or fracturing of a stone’s outer surface or edges. While delamination is a layered separation, spalling often results from extreme subsurface pressure—such as trapped moisture freezing during freeze-thaw cycles or the expansion of rusted internal metal pins. The stressed outer shell or “face” shears completely off the core of the monument.

2. The Primary Causes of Failure

Understanding why stone delaminates and spalls requires looking at the physical composition of the rock and the external forces acting upon it:

  • Freeze-Thaw Cycles (Frost Weathering): Porous stones absorb rainwater. When temperatures drop below freezing, that trapped moisture expands by roughly 9%, generating immense internal hydraulic pressure. This repeated expansion and contraction forces bedding planes apart, driving delamination.
  • Incompatible Repairs (Portland Cement): Historically, well-intentioned repairs often utilized modern, rigid Portland cement instead of breathable, historic lime-based mortars. Portland cement is dense, inflexible, and completely impermeable. When moisture enters a monument repaired with cement, it cannot evaporate freely; instead, it is trapped and forced to migrate through the stone. As moisture and salts build up behind the surface, it triggers severe spalling.
  • Internal Corrosion of Iron Pins: Many multi-piece monuments and heavy tablets were originally anchored using iron or steel dowels. Over decades, water infiltration causes these pins to rust. As iron oxidizes, it expands to several times its original volume, exerting irresistible internal pressure that cracks and spalls the surrounding stone.
  • Granular Disaggregation (“Sugaring”): Acid rain and prolonged moisture exposure dissolve the natural mineral binders (such as calcite or silica) holding individual stone grains together. As the internal matrix breaks down due to this inherent vulnerability, the stone loses its cohesive strength, making the outer layers vulnerable to peeling and crumbling.

3. Best Practices for Prevention and Conservation

Treating delaminating and spalling markers requires a strict adherence to preservation ethics—most importantly, do no harm. Aggressive interventions or quick fixes will permanently destroy the artifact.

  • Avoid Harsh Mechanics and Materials: Never use heavy machinery, pressure washers, or abrasive tools like wire wheels on fragile, delaminating stone. Furthermore, entirely avoid modern Portland cement, which will trap moisture and accelerate spalling.
  • Stabilize with Breathable Mortars: When resetting or repairing fractured markers, always use breathable materials like Natural Hydraulic Lime (NHL). NHL mortars allow trapped moisture to evaporate harmlessly through the joints rather than forcing it through the stone face.
  • Consider Stone Consolidants: For stones suffering from internal granular breakdown (sugaring) that leads to surface peeling, professional application of ethyl silicate-based consolidants (such as Prosoco OH100) can help rebond the mineral matrix from the inside out, preserving surface details.
  • Gentle Maintenance and Documentation: Conduct regular, low-impact inspections to catch micro-fractures early. Always maintain thorough photographic and written logs of any stabilization work performed to ensure long-term stewardship.

Conserving Historic Limestone, Sandstone, and Marble: The Science Behind Stone Consolidants

Historic limestone, sandstone, and marble markers provide a tangible link to the past, but they are subject to severe environmental degradation over time. As moisture cycles, freeze-thaw pressures, and atmospheric pollutants attack porous stone, binders dissolve and mineral grains begin to detach. This structural breakdown—known professionally as disaggregation and commonly referred to as sugaring—leaves once-crisp carvings dangerously fragile and prone to accelerated erosion.

When a historic stone reaches the point where surface material crumbles away at the touch, cleaning and basic repointing are no longer enough. The stone requires chemical consolidation. Understanding how stone consolidants work—and knowing when and how to apply them—is vital for halting structural decay without altering the stone’s physical integrity.

Step 1: Diagnose the Failure Mechanism (Sugaring / Disaggregation)

Before introducing any conservation treatment, you must diagnose the specific type of decay affecting the monument:

  • The Mechanics of Sugaring: Sandstone (held together by mineral cements like silica, calcite, or iron oxide), limestone (composed primarily of calcium carbonate), and marble (a metamorphic rock composed of recrystallized carbonate minerals) all rely on interstitial bonding between individual mineral grains or crystals. When acid rain, soluble salts, or prolonged moisture exposure break down these internal binding agents, the stone loses its cohesive strength. Grains begin to separate and sand away under light friction.
  • Distinguishing Surface Soiling from Structural Loss: Do not confuse surface crusts or biological growth with stone degradation. A stone that is structurally sound beneath dirt requires gentle washing rather than consolidation. Consolidation is specifically reserved for friable stone where the mineral matrix itself is failing from the inside out.

Step 2: The Science of Consolidants (Ethyl Silicates and Mineral Formulations)

Stone consolidants are liquid treatments designed to penetrate porous stone and redeposit binding minerals deep within the pore structure, artificially recreating the lost natural cement.

  • Ethyl Silicate-Based Consolidants (e.g., Prosoco OH100): These are the gold standard for silicate-bearing stones like sandstone, many limestones, and friable or sugar-textured architectural marble where intercrystalline bonds have degraded. When applied, the liquid ethyl silicate penetrates the pore network via capillary action and reacts with ambient atmospheric and pore moisture through hydrolysis and condensation (a process called sol-gel transition). It deposits an amorphous silica gel that binds the loose mineral grains and crystals together. As it cures, the ethanol byproduct evaporates, leaving behind a hard, breathable mineral network that matches the stone’s original rigidity.
  • Silicate/Waterglass Formulations (e.g., LimeWorks Waterglass): Often utilized for specific historic lime-bound matrices or calcareous stones, these treatments react with free calcium ions within the stone to form calcium silicate hydrates, strengthening fragile surfaces.

Step 3: Critical Pre-Application Assessment

Applying a consolidant incorrectly can trap moisture, seal vapor pathways, and cause catastrophic subsurface spalling (where the treated outer shell shears away from the untreated interior).

  • Ensure Thorough Drying: The stone must be completely dry before application. Trapped moisture prevents proper chemical curing of ethyl silicates and can cause milkiness or surface whitening.
  • Test Porosity and Absorption: Perform a preliminary test on an unobtrusive area to ensure the stone is sufficiently porous to absorb the liquid. Non-porous or case-hardened stones will reject the consolidant, leading to surface pooling and glossy, impermeable films.
  • Never Over-Apply: Consolidants change the porosity and vapor permeability of a stone. Apply only enough product to rebond the matrix, avoiding oversaturation that creates an impermeable boundary layer.

Step 4: Application Techniques for Optimal Penetration

Consolidants require careful, methodical application to achieve deep, even penetration without running off the vertical face of a marker.

  • Wet-on-Wet Application: Apply the liquid consolidant using a low-pressure spray or a soft brush, working from the bottom up to prevent premature run-down streaks. Maintain a “wet-on-wet” approach by applying successive coats before the previous layer has dried completely, allowing the liquid to pull deeper into the interconnected pore network.
  • Wipe Excess Surfaces: Prevent the formation of shiny or glossy surface films (often referred to as “consolidation gloss”) by wiping away any unabsorbed liquid with a clean solvent-dampened cloth before it cures. Consolidants should strengthen the interior structure invisibly without changing the natural matte appearance and texture of the historic stone.
  • Allow Proper Curing Times: Protect the treated monument from direct heavy rain, wind-blown dust, and extreme heat during the multi-day curing window so the chemical reactions can complete successfully.

Key Takeaways for Stone Consolidation

  • Target Friable Stone: Reserve consolidants like Prosoco OH100 for actively sugaring and disaggregating limestone, sandstone, and marble where internal mineral bonds have failed.
  • Maintain Permeability: Ensure the treatment preserves the stone’s natural ability to breathe and transmit moisture vapor.
  • Avoid Surface Gloss: Meticulously remove excess surface residue during application to maintain an authentic, matte historic finish.

Managing Subsurface Hazards: Dealing with Sunken Graves and Soil Stabilization

Walking through a historic cemetery, it is common to encounter rolling or uneven terrain that goes far beyond natural topography. The appearance of a sunken grave—where the ground has dropped several inches or feet below the surrounding grade—is one of the most frequent subsurface hazards in older burial grounds.

These depressions are not merely aesthetic blemishes. They pose a tripping hazard for visitors, accelerate stone displacement by destabilizing monument foundations, and can indicate advanced structural failure beneath the turf. Understanding why ground subsidence happens and how to safely stabilize it—while recognizing when intervention should be avoided entirely—is essential for long-term cemetery stewardship.

Step 1: Diagnose the Cause of Ground Subsidence

Before taking corrective action, it is important to understand what is happening beneath the surface. In nineteenth- and early-twentieth-century burials, subsidence typically falls into three categories:

  • Decomposition and Void Collapse: Historically, bodies were interred in wooden coffins or early burial vaults. As the wood rotted and collapsed under the weight of the overlying earth, soil rushed into the empty voids, creating a sudden depression at the surface.
  • Incomplete Initial Backfilling: Manual backfilling of graves during the nineteenth century often left behind loose, uncompacted soil pockets. Over years of heavy rainfall, water percolates through the soil column, washing fine sediments downward and causing the backfill to settle unevenly.
  • Erosion and Subsurface Drainage: Poor surface grading can cause rainwater to channel directly over gravesites, eroding topsoil and accelerating the deepening of existing depressions.

Step 2: Assess Safety and Structural Risks

Sunken graves rarely exist in isolation; they frequently compromise nearby stone monuments.

  • Check Foundation Integrity: When soil drops away around the base of a heavy grave marker, the monument loses its lateral support. This often leads to tilting, sliding off the masonry socket, or outright structural collapse.
  • Prioritize Work Areas: Flag hazardous depressions and severely tilted stones before hosting volunteer groups or allowing public foot traffic through the section.

Step 3: Respect Unmarked Depressions — The Depression Is the Marker

Before attempting any stabilization or backfilling, conservation workers and volunteers must evaluate whether the depression should be touched at all.

In many historic, pioneer, or neglected burial grounds, the depression is the marker. When wooden markers have long since decayed and stones have vanished, the sunken grade directly outlines the location of an unmarked burial shaft. Do not fill in or level out historic ground depressions in unmarked sections. Flattening these areas obliterates the physical topography that preserves the identity and location of the resting soul, effectively erasing the final physical evidence of the grave.

Step 4: Ethical and Non-Invasive Stabilization Techniques

For identified plots where filling is necessary to protect an adjacent leaning monument or eliminate a severe hazard, restoration must be done carefully to respect human remains and maintain the archaeological integrity of the site. Never excavate or drive heavy mechanical compactors directly over a burial shaft.

  • Lift the Turf (When Applicable): Carefully cut and roll back the healthy turf in sections using a square-nosed spade, preserving the root mat so it can be relayed later.
  • Layered Soil Infill: Fill the depression in shallow, incremental lifts (typically 3 to 4 inches at a time) using a clean, well-draining soil mix that matches the surrounding regional soil texture (typically a balanced sandy loam).
  • Manual Compaction Only: Tamp each layer down gently using hand tools (such as a flat tamper or the back of a shovel). Avoid heavy mechanical plate compactors on historic gravesites, as excessive vibration can damage fragile underground coffins, vaults, or shifting stone foundations.
  • Relay and Seed the Surface: Bring the grade up to match the surrounding level, leaving a very slight crown to account for final natural settling. Relay the saved turf over the top, or rake and overseed with a durable, drought-resistant grass blend suited for cemetery grounds.

Step 5: Long-Term Grading and Drainage Control

Fixing a single sunken grave is only a temporary fix if surface water continues to pool in the area.

  • Direct Runoff Away from Plots: Ensure that pathways and adjacent terrain slope gently away from burial rows to prevent water from pooling over the graves.
  • Monitor and Maintain: Historic cemeteries are dynamic environments. Plan for periodic follow-up inspections, as backfilled soil can take several seasons to settle completely.

Key Takeaways for Subsurface Management

  • Never Fill Unmarked Sinks: Recognize that historic ground depressions in unmarked sections serve as the primary physical indicator of a grave.
  • Address Safety First: Stabilize severely compromised, leaning monuments that threaten visitor safety.
  • Use Hand Methods: Always rely on manual backfilling, layered soil building, and hand tamping to protect archaeological layers and underground features.

Tracing Ancestors in the Graveyard: A Beginner’s Guide to Cemetery Genealogy

Historic cemeteries are much more than outdoor architectural museums or repositories of stone artistry—they are open-air archives of human history. For many visitors, walking through the rolling grounds of an old burial site is deeply personal. Behind every weathered headstone, footstone, or family obelisk lies a genealogical puzzle waiting to be solved.

Whether you are an amateur historian tracking down your own lineage or a volunteer helping to piece together the history of an abandoned burial ground, graveyard genealogy bridges the gap between physical stones and family trees. Here is a practical, step-by-step guide to tracing your ancestors using the physical and documentary evidence found in the graveyard.

Step 1: Start in the Field — Collecting Clues from the Stone

Before opening a single digital database, let the headstone speak. Nineteenth-century monuments were carefully crafted documents in stone, often containing vital statistics and familial relationships that might not be captured anywhere else.

  • Examine Epitaphs and Relationships: Look closely at how names and kinships are recorded. Terms like “Consort of” (wife of), “Son of,” or “In Memory Of” establish immediate domestic connections. Multiple names carved on a single die or family monument outline household structures at a glance.
  • Calculate Birth Dates from Age at Death: Many older stones record age down to the exact year, month, and day (e.g., “Aged 42 Yrs, 3 Mos, 14 Dys”). By subtracting these increments from the exact date of death, you can frequently pinpoint a birth year long before official birth certificates were universally required by the state.
  • Note the Carving Style and Symbolism: As covered in our guide on Silent Language in Stone, specific motifs offer clues. For instance, a plucked flower bud or a carved lamb almost always points to the tragic loss of an infant or young child, helping you identify missing children who may not have survived to appear on subsequent census records.

Step 2: Navigate the Spatial Hierarchy (Section, Row, Plot)

Graves were rarely dug at random; nineteenth-century sextons and cemetery associations maintained strict spatial layouts. To trace a family effectively, you must understand where they are positioned within the broader landscape.

  • Map the Family Plot: Wealthier or established families frequently purchased multi-plot enclosures or contiguous rows. If you find one ancestor, look immediately to the left, right, and rear. Parents, unmarried siblings, and infant children are frequently clustered in the same immediate footprint.
  • Leverage Cemetery Maps and Sextons’ Records: If the site has active administration or historical documentation, consult original paper ledgers, burial cards, or digital GIS maps (such as those discussed in our Precision in the Field GIS guide). Plot numbers provide the exact grid coordinates needed to cross-reference municipal death ledgers.

Step 3: Transition to the Archives — Cross-Referencing Vital Records

Physical headstones provide the skeleton of a family tree, but archival records put flesh on the bones. Once you have transcribed the names and dates from the cemetery, cross-reference them with primary and secondary historical sources:

  • Find a Grave and BillionGraves: These large digital databases often feature user-submitted photographs of headstones alongside transcriptions and user-contributed family links, allowing you to connect with distant cousins researching the same lineage.
  • Federal and State Censuses: Search decennial census records (from 1850 onward, which list individual family members by name) to track your ancestor’s household, occupation, and neighbors across decades. Pay attention to neighbors—rural burial plots were frequently established on family farms or donated acreage shared by allied neighboring families.
  • County Vital Statistics and Death Certificates: Look for official state records, which became mandatory in many states around the turn of the 20th century. Death certificates will often list exact birthplaces, parents’ names (including maiden names), and the specific cemetery of interment.
  • Local Newspaper Obituaries: Historic newspapers are treasure troves. An obituary published around the exact date of death found on a headstone will frequently list surviving children, fraternal memberships (which explain symbols like the IOOF or Masonic square and compass on the stone), and church affiliations.

Step 4: Reconstructing Unrecorded or Abandoned Graves

When researching historic pioneer cemeteries or neglected burial grounds, official sexton books are frequently missing, lost, or never existed. Reconstructing the burial population requires deep historical detective work:

  • Church Parish Registers: Many early denominations kept meticulous baptismal, marriage, and burial records independent of civil governments.
  • WPA Graves Registration Projects: During the 1930s, the Works Progress Administration cataloged thousands of early American graves. Check state libraries or historical society archives for vintage WPA cemetery indexes, which often recorded pioneer markers that have since weathered away or vanished.
  • Probate and Land Records: Wills and estate settlements frequently mention family burial plots or instructions for monument purchases, offering legal proof of lineage when physical stones are broken or unreadable.

Key Takeaways for Cemetery Genealogists

  • Let the Stone Guide You: Treat the headstone as your primary source document, capturing exact inscriptions, calculated birth dates, and familial clustering before turning to digital databases.
  • Think Spatially: Pay attention to who is buried nearby; family plots and neighboring stones often reveal unrecorded kinships.
  • Verify Everything: Always cross-reference physical cemetery inscriptions with census, vital, and newspaper records to ensure accurate genealogical reconstruction.

Vulnerable Landscapes: The Growing Threats to Historic Cemeteries

Historic cemeteries are irreplaceable cultural repositories, acting as open-air archives of local history, art, and genealogy. Yet, unlike museums housed within climate-controlled buildings, these sacred grounds face constant, compounding pressures. Left unchecked, environmental forces, human neglect, and improper maintenance can rapidly erase a cemetery’s physical fabric and historical record.

1. Environmental Pressures and Weathering

Nature is relentless in its transformation of stone, and environmental factors are among the primary drivers of monument degradation.

  • Acid Rain and Atmospheric Pollution: Airborne pollutants react with calcium carbonate-based stones like marble and limestone, accelerating surface dissolution, blurring carved inscriptions, and promoting granular disintegration (“sugaring”).
  • Biological Colonization: While gentle biological growth is a natural part of a stone’s aging process, aggressive root systems, lichens, and heavy moss can trap moisture against the stone, freeze-thaw cycles can pry apart micro-fractures, and improper chemical treatments can permanently stain or weaken historic masonry.
  • Extreme Weather Events: Increased frequency of severe storms brings high winds, heavy rainfall, and flooding that can destabilize saturated soils, topple leaning headstones, and cause catastrophic structural failures across aging mausoleums and perimeter walls.

2. Encroachment, Development, and Neglect

As towns and cities expand, historic burial grounds often find themselves vulnerable to modern pressures and administrative abandonment.

  • Urban Sprawl and Vandalism: Abandoned or rural pioneer cemeteries are frequently hemmed in by commercial development, roadway expansions, or residential encroachment, leading to accidental damage, dumping, or intentional vandalism.
  • Loss of Institutional Stewardship: When local churches, fraternal lodges, or small cemetery associations dissolve, properties are frequently orphaned. Without active maintenance funds or legal oversight, grounds become completely overgrown with brush and invasive trees.
  • Flora and Fauna Pressures: Unchecked vegetative growth and animal activity pose constant physical risks. Aggressive root systems and expanding tree trunks exert immense pressure that physically shifts heavy headstones out of alignment, fractures bases, and uproots markers, while burrowing wildlife can destabilize subsurface soils and foundations.

3. Destructive Maintenance Practices

Ironically, well-intentioned maintenance efforts by untrained volunteers or misinformed grounds crews often pose one of the most severe threats to historic stones.

  • Mechanical Damage: The use of heavy commercial lawnmowers and string trimmers directly against fragile historic stones causes chronic impact fracturing, chipping, and base destabilization.
  • Harsh Cleaning Methods: The application of abrasive power-washing, sandblasting, corrosive chemical cleaners (such as bleach or acid washes), or aggressive abrasive tools like nylon wheel brushes mounted on power drills permanently strips away the protective outer crust of historic stone, scouring away delicate tool marks and accelerating irreversible decay.
  • Inappropriate Repairs: Using modern Portland cement mortar to reset or repair historic limestone, marble, or sandstone blocks is counterproductive; Portland cement is far harder and less breathable than historic stone, causing the surrounding historic material to spall and crumble under thermal expansion.

Key Takeaways for Cemetery Preservation

  • Recognize the Multi-Faceted Risk: Protecting a cemetery requires guarding against environmental decay, urban encroachment, and destructive maintenance practices alike.
  • Commit to Ethical Conservation: Always utilize gentle, non-destructive cleaning methods, breathable lime mortars, and non-mechanical care protocols to ensure long-term physical stability.

Silent Language in Stone: Decoding Historic Headstone Symbolism

Historic cemeteries are rich visual archives, filled with carved imagery that communicates religious beliefs, social status, and personal attributes of the deceased. Before the widespread use of standardized epitaphs, carvers relied on a deeply understood vocabulary of symbols to express grief, hope, and the journey of the soul.

1. Floral and Botanical Motifs

Nature has long served as a reflection of human life, mortality, and rebirth. Botanical carvings are among the most common elements found on 18th- and 19th-century markers:

  • The Weeping Willow: A staple of the Victorian era, symbolizing profound grief, sorrow, and mourning for the dead.
  • Calla Lilies: Striking trumpet-shaped blossoms and large leaves that symbolize majestic beauty, purity, resurrection, and sympathy.
  • Flowers and Petals (Buds, Full Blooms, and Rosettes):
    • A plucked flower bud often represents a life cut short, such as an infant or child.
    • A full-bloom flower signifies a life lived to its natural completion, while broken stems point directly to sudden, tragic loss.
  • Rosettes: Often styled as circular flower or daisy motifs, rosettes symbolize the cycle of life, spiritual awakening, and the eternal blossoming of the soul in heaven.
  • Wreaths: As a continuous, unbroken circular band of foliage or flowers, the wreath symbolizes eternal life, victory over death, and the soul’s triumph and immortality.
  • Broken Branches: Similar to broken stems and columns, a severed or broken tree branch poignantly symbolizes a family tree interrupted or a life cut short unexpectedly.
  • Ivy and Evergreens: Ivy symbolizes everlasting memory, fidelity, and attachment that survives death, while evergreens represent eternal life and the immortality of the soul.
  • The Palm Frond: Associated with victory, triumph over death, and martyrdom.
  • Fern Fronds: Representing humility, sincerity, endurance, and shelter, fern fronds are frequently carved on Victorian-era markers to symbolize grief, sorrow, and the peaceful rest of the deceased.

2. Celestial and Cosmic Symbols

Carvers frequently looked to the skies to represent the transition from earthly existence to the divine realm:

  • The Sun, Stars, and Moon: The setting sun often marks the end of a life, while crescent moons or stars point toward spiritual ascension and the heavenly spheres.
  • The Ouroboros: A serpent swallowing its own tail, symbolizing eternity, infinity, and the continuous cycle of life and rebirth.
  • The Winged Skull and Cherub: Common on 17th- and 18th-century slate and sandstone markers, the grim death’s head warned onlookers of mortality, while the transition to the winged cherub in later decades reflected a more hopeful view of resurrection and heaven.

3. Structural and Architectural Elements

Monuments themselves often incorporate structural motifs that carry deep theological weight:

  • The Anchor: Symbolizes a steadfast, immovable hope in Christ and eternal salvation, frequently found on maritime markers or those of sailors.
  • Arches and Draped Arches:
    • Arches: Symbolize victory, triumph, and the gateway to heaven, representing the passage from earthly life into the celestial kingdom.
    • Draped Arches: Enhanced with a carved cloth or funeral shroud, the draped arch deepens this imagery, symbolizing mourning, the transition across the veil between life and death, or a sacred canopy over the departed.
  • Columns, Obelisks, and Draped Variations:
    • The Broken Column: Denotes a life cut prematurely short, representing a structural pillar shattered before its time.
    • Obelisks and Columns: Generally symbolize strength, nobility, and a steady ascent toward the divine. When draped (featuring a carved cloth or shroud), they emphasize heavy mourning, the veil between life and death, or the protection of the mortal body in sleep.
  • Urns and Draped Urns: The urn is one of ancient history’s oldest symbols of mourning and the vessel that holds mortal remains. A draped urn—covered with a burial shroud—symbolizes the separation of the soul from the physical body, sorrow, and the transition into a sacred, hidden eternity.
  • Gates and Open Doors: Represents the passing from the earthly world into the heavenly kingdom, often depicted slightly ajar to welcome the soul.

4. Interpersonal and Relational Symbols

Carvings that reflect earthly bonds, affection, and personal connections:

  • The Handshake (“Farewell”): A symbol of final parting on earth coupled with the hope of a joyful reunion in heaven, often signifying marital devotion, partnership, or familial bonds..

5. Religious and Mortuary Iconography

Direct spiritual symbols and figures frequently appeared on Victorian and older monuments to emphasize innocence, faith, and divine direction:

  • IHS Monogram: A sacred christogram representing the first three letters of the Greek name for Jesus (IHS), serving as a powerful declaration of the deceased’s faith and redemption.
  • The Finger Pointing to Heaven: A carved hand with the index finger directed upward, signifying that the deceased’s soul has ascended to heaven or directing the living onlooker to look toward God.
  • The Lamb: A classic symbol of innocence, purity, and gentleness, most commonly found on the markers of infants and young children, often shown lying down peacefully.
  • The Dove: A classic symbol of peace, purity, the Holy Spirit, or the soul taking flight to heaven. When depicted resting peacefully or nestled down on a marker, it represents gentleness, innocence, and the peaceful release of the soul—frequently found on Victorian-era memorials, particularly for infants and children.
  • The Bible or Book of Life: Represents the Holy Scriptures, Christian faith, and the Book of Life in which the names of the redeemed are inscribed. An open book often signifies a life open before God or the completion of an earthly record.
  • Crosses and Crucifixes: Representing the core of Christian faith, redemption, sacrifice, and the victory of eternal life over death through the crucifixion and resurrection of Jesus Christ.
  • Angels: Symbolizing heavenly messengers, divine protection, and spiritual guides who accompany and guard the soul during its transition from earth to eternity.
  • The Alpha and Omega: Derived from the first and last letters of the Greek alphabet (representing Christ as the beginning and the end), symbolizing eternity, divine completion, and the everlasting presence of God.

Grapes: Representing the “True Vine,” spiritual nourishment, Holy Communion, and the fruits of a righteous life, grape clusters are carved on historic markers to symbolize Christian faith, abundance, and the spiritual bounty of the heavenly kingdom.

The Triangle in a Circle: Representing the Holy Trinity (Father, Son, and Holy Spirit) encompassed by eternity, the triangle within a circle is a classic Christian emblem symbolizing God’s infinite, unending nature and divine unity.

6. Fraternal and Civic Symbols

During the 19th and early 20th centuries, membership in fraternal organizations was a central part of many individuals’ identities, proudly displayed on their headstones:

  • Freemasonry (The Square and Compasses): Represents morality, architectural precision, and the Great Architect of the Universe.
  • Independent Order of Odd Fellows (IOOF): Frequently marked by the three linked chains symbolizing Friendship, Love, and Truth, often accompanied by the letters FLT.
  • Grand Army of the Republic (GAR) & Keystone Motifs: Depicting a wedge-shaped keystone symbol (frequently associated with veterans’ organizations and state regimental history), representing foundational strength, support, and Civil War military service.
  • Woodmen of the World & Women’s Auxiliary: Distinctive markers carved to resemble stacked logs, tree stumps, axes, and wedges for members, alongside emblems featuring the American shield and the Woman’s Circle monogram (W.C.) for female auxiliary members, reflecting mutual aid and family protection.
  • Improved Order of Red Men: Marked by symbols such as a Native American chief profile in a headdress or crossed tomahawks, reflecting a prominent 19th-century fraternal organization utilizing indigenous-inspired imagery and rituals.

The Maccabees (Knights of the Maccabees): A prominent 19th- and early 20th-century fraternal benefit and insurance society, typically marked by an emblem featuring crossed swords or axes alongside a shield and military iconography, drawing inspiration from historical figures who championed freedom and family protection.

The Heart, Cross, and Anchor (Pythian Sisters): A powerful triad of symbols representing Christian virtues—the heart for charity/love, the cross for faith, and the anchor for steadfast hope—which also serves as the primary emblem of the Pythian Sisters, the women’s auxiliary of the Knights of Pythias.

Key Takeaways for Historic Preservationists

  • Read the Whole Monument: Symbolism extends beyond text; carvings provide vital clues regarding the era, cultural background, and personal history of the interred.
  • Document Iconography: When conducting cemetery surveys, record carved motifs alongside stone types and conditions to preserve the full historical narrative of the site.

Rock of Ages: Understanding Stone Materials and Marker Types in Historic Cemeteries

Cemeteries are open-air museums, preserving not just names and dates, but the geological and architectural preferences of eras past. When undertaking preservation work, understanding the material composition and the structural design of a grave marker is essential, as these factors dictate both the patterns of decay and the appropriate conservation treatments.

Part 1: Common Stone Materials

The longevity of a marker is primarily determined by its geology. Historically, availability and carver skill influenced choices, leading to distinct regional characteristics.

  • Sandstone (Brownstone): Prominent in the 17th and 18th centuries, sandstone is a sedimentary rock. It is relatively soft and easy to carve, allowing for the elaborate, deep relief imagery of early colonial carvers (like death’s heads and winged cherubs). However, it is highly susceptible to “sugaring” (granular disintegration) and delamination (spalling) along its natural bedding planes.
  • Slate: Another popular early choice, slate is a metamorphic rock known for its exceptional durability and ability to hold extremely fine, sharp detail. While it resists weathering well, slate is brittle and prone to catastrophic fractures or delamination, particularly along its edges.
  • Limestone: Widely used throughout the 19th and early 20th centuries, limestone is a sedimentary rock prized for its fine, even grain and workability. While more durable than sandstone, it remains susceptible to environmental weathering, biological colonization, and surface erosion over decades of exposure.
  • Marble: The iconic white stone of the 19th century. A metamorphic rock, marble offered carvers a uniform texture and a beautiful luster. Unfortunately, its calcium carbonate composition makes it vulnerable to acid rain and environmental pollutants, which cause “sugaring,” blurring the inscriptions, and often turning the stone a ghostly grey or yellow.
  • Granite: The standard material of the 20th century and today. An igneous rock, granite is incredibly hard, dense, and resistant to virtually all forms of environmental decay. Its toughness requires mechanized carving, leading to the precise but often less detailed inscriptions common in modern memorialization.

Part 2: Marker Types and Forms

The physical shape and configuration of a monument span simple traditional slabs, multi-component architectural units, and specialized regional designs. Drawing from standard preservation typologies, historic markers are broadly classified by their structural form:

  • Tablets: The most traditional vertical form, including standard upright tablets, rounded or raised-top variants, and stones set directly into the ground or anchored into stone/concrete sockets.
  • Die and Base Monuments: Multi-piece configurations featuring a vertical primary marker block (the die) resting upon a solid stone foundation (the base), frequently capped with a decorative top piece (die, base & cap).
  • Architectural and Vaulted Tombs: Elaborate structures designed above ground level, including table tombs, pedestal tombs, and vaulted or box tombs that commemorate individuals or entire families with elevated masonry slabs.
  • Obelisks: Tall, slender, four-sided monuments tapering to a pyramidion at the top, popularized during the 19th-century Rural Cemetery Movement to symbolize eternal life within prominent family plots.
  • Pulpit Markers: Low-profile, desk-like markers featuring a slanting top surface designed to display the inscription at an easily readable angle.
  • Cradle and Bedstead Monuments: Specialized marker assemblies featuring a headstone and footstone connected by side rails or low frames (cradles), which enclose the grave plot and are frequently found in historic and African American burial traditions.
  • Government-Issued Markers: Standardized military and federal stones provided for veterans, including historical upright marble slabs and standardized granite or bronze markers issued across various conflicts.
  • Modern Markers: Contemporary flush-mounted lawn-type markers, pillow markers, and flat bronze plaques designed for simplified commercial grounds maintenance.

Comprehensive Cemetery Documentation: From Field Assessments to Historical Reconstruction

Thorough documentation is the bedrock of professional cemetery preservation and management. Without a robust record-keeping system, physical repairs risk becoming untraceable, and the rich historical narratives embedded within a burial ground can be lost to time. Complete cemetery documentation bridges physical conservation, spatial mapping, and genealogical research into a unified archive.

1. Monument Assessments and Work Completed

Every intervention in a historic cemetery must begin with detailed condition reporting and conclude with a record of the methods applied.

  • Grave Marker Assessments: Initial evaluations record stone composition, structural stability, weathering patterns, and specific deterioration mechanisms (such as sugaring, fractures, or biological staining) before any tools touch the stone.
  • Work Completed Logs: Following conservation, technicians log the exact treatments performed—including mechanical stabilization, mortar repairs using lime-based mixes, and gentle cleaning agents—to ensure future caretakers understand the history of intervention.
  • Before-and-After Visual Records: Standardized photographic documentation captures each monument prior to treatment and immediately after completion, providing indisputable visual proof of structural stabilization and surface preservation.

2. Site-Wide and Ancillary Assessments

Preservation extends beyond individual headstones to encompass the entire cemetery ecosystem and built infrastructure.

  • Infrastructure and Ancillary Features: Documentation must cover boundary walls, entrance gates, paths, administrative offices, storage sheds, historic chapels, and above-ground family mausoleums, recording masonry conditions, roof integrity, and moisture intrusion.
  • Landscape Management: Assessments log the layout of historical plantings and the proximity of large trees to ensure that environmental pressures are monitored over time.

3. Systematic Burial Inventories

To make a cemetery fully navigable for descendants, historians, and groundskeepers, records must be organized logically by spatial hierarchy.

  • Section, Row, and Plot Ordering: Burial listings are indexed systematically from macro to micro—breaking the grounds down by designated sections, individual rows, and exact plot coordinates—allowing anyone to locate a specific grave instantly.

4. Historical and Genealogical Reconstruction

When historic records are missing, incomplete, or entirely absent due to lost ledgers, comprehensive documentation requires deep historical detective work.

  • Archival and Genealogical Research: Conservators and researchers reconstruct lost burial populations by cross-referencing historical census data, death certificates, county vital statistics, church parish registers, and local newspaper obituaries.
  • Generating Primary Records: Through rigorous historical research, abandoned or unrecorded burial grounds can be brought back into the historical record, establishing a definitive roster of the interred when no original sexton books survive.

Key Takeaways for Cemetery Documentation

  • Record Every Step: Pair pre- and post-treatment condition assessments with thorough logs of completed conservation work.
  • Organize Spatially: Maintain structured burial registries ordered clearly by section, row, and plot.
  • Reconstruct the Lost: Utilize archival research and genealogical records to build complete documentation for neglected or undocumented historic sites.

Precision in the Field: Cemetery Mapping Using GIS and Open-Source Records Management

Traditional paper burial ledgers, faded index cards, and unmapped burial grounds present a massive logistical challenge for historical preservationists and active cemetery sextons alike. As historic cemeteries deteriorate and active grounds expand, relying on physical memory or fragmented records is no longer sustainable. Geographic Information Systems (GIS) provide a powerful solution, transforming spatial data and genealogical records into an interconnected, searchable digital map.

1. The Power of GIS: Tying Spatial Data to the Interred

At its core, cemetery mapping using GIS bridges the gap between geography and genealogy. Instead of treating a headstone as a standalone object, GIS maps individual spatial coordinates (captured via high-accuracy GNSS/GPS receivers) directly to a relational database containing comprehensive records for every person interred.

  • Detailed Interred Information: Each spatial point or polygon corresponding to a plot contains rich biographical and historical data. This typically includes the full name of the deceased, birth and death dates, burial or plot numbers, veteran status, stone material, condition notes, direct high-resolution headstone photographs, and cross-references to historical death certificates or obituaries.
  • Spatial Relationships: GIS allows administrators to visualize family plots, track burial density over time, analyze chronological expansion across historic sections, and immediately locate specific gravesites in sprawling or overgrown grounds.

2. Digital Transformation for Active Cemeteries Without Proprietary Expenses

For active cemeteries, municipal boards, and small historical associations, digitizing records is essential. However, many commercial cemetery management software platforms come with steep recurring subscription fees, proprietary data lock-in, and restrictive user licenses.

An open-source GIS workflow (utilizing tools like QGIS and QField) offers a robust, cost-effective alternative that gives cemeteries complete ownership of their data without the heavy financial burden.

  • Open-Source Toolchain: By leveraging QGIS for desktop data management and QField for rugged field data collection on tablets, operators can build custom spatial databases using standard open formats (such as GeoPackage).
  • Cost Efficiency: Eliminating proprietary software licensing fees means funds can be redirected back into actual physical maintenance, stone conservation, and groundskeeping.
  • Data Sovereignty: Unlike cloud-based commercial platforms where data resides on a third-party server behind a paywall, an open-source GIS database remains entirely on local hardware or self-hosted servers, ensuring long-term institutional control, privacy, and flexibility.

Key Takeaways for Cemetery GIS Mapping

  • Connect People to Places: GIS transforms isolated headstones into an interactive database linking precise plot coordinates directly to the vital statistics of the interred.
  • Embrace Open-Source Alternatives: Active cemeteries can fully digitize their mapping and records without expensive proprietary management software.
  • Own Your Data: Utilizing open standards ensures long-term accessibility, customization, and absolute control over your cemetery’s historical and operational records.

Cemetery Assessments and Strategic Planning: From Field Data to Prioritized Action

Preserving a historic cemetery requires far more than just cleaning a few headstones or resetting a fallen marker. Because historic burial grounds function as complex, interconnected landscapes, any successful conservation effort must begin with a comprehensive site assessment followed by a prioritized master plan. Without a structured roadmap, preservation work can become reactive, inefficient, or—worse—harmful to the historic fabric.

1. Comprehensive Cemetery Assessments

A thorough assessment goes beyond individual monuments to evaluate the entire landscape and its built environment. Every feature tells a part of the site’s history and dictates its current structural needs.

  • Grave Markers and Monuments: Every headstone, tablet, box tomb, and obelisk must be individually cataloged. Conservators assess stone types (sandstone, marble, limestone, granite), physical stability (standing, leaning, sunken, or fractured), and surface conditions (granular disaggregation, biological growth, or staining).
  • Historic Structures: Evaluations must encompass built architecture within the grounds, such as administrative offices, storage sheds, historic chapels, and above-ground family mausoleums, noting masonry conditions, roof integrity, and moisture intrusion.
  • Landscape and Ancillary Features: Assessments must capture all site-wide elements. This includes perimeter fencing, entrance gates, retaining walls, paths, and prominent historical plantings or large trees.

2. Strategic Planning: Prioritizing Conservation Work

Once field data is compiled into a master inventory, strategic planning determines the order of operations. Because resources, time, and funding are almost always limited, work must be prioritized according to urgency and impact.

  • Phase 1: Life Safety and Immediate Stability: The highest priority is always mitigating active hazards. This includes stabilizing severely toppling monuments or compromised structural elements on chapels and mausoleums that pose a physical danger to visitors, securing loose fragments before they are lost or stolen, and addressing critical structural failures on heavy box tombs or perimeter walls.
  • Phase 2: Arresting Rapid Deterioration: Next, focus shifts to stones and structures undergoing active, accelerated decay. This involves applying consolidants to sugar-rotting sandstone or limestone, treating structural cracks, and re-anchoring shifting elements before environmental forces cause complete loss.
  • Phase 3: Standard Monument Restoration: Once immediate safety and active decay hazards are resolved, work proceeds to the comprehensive resetting, structural mending, and alignment of all remaining leaning, sunken, or fractured markers across the site.
  • Phase 4: General Maintenance and Environmental Care: Lower priorities include routine cleanings to remove damaging biological staining, repainting historic iron fencing to halt corrosion, and carrying out long-term landscape management.

Key Takeaways for Cemetery Preservation

  • Look at the Whole Picture: Assess boundary-to-boundary features—including ironwork, walls, built structures, and landscape topography—alongside individual grave markers.
  • Stabilize Before You Clean: Never invest time in aesthetic cleaning or minor detailing until structural safety and active environmental decay have been addressed.
  • Build a Phased Roadmap: A clear, prioritized plan keeps preservation projects organized, defensible, and sustainable over years of careful stewardship.

Wrought and Cast Iron Fencing: Victorian Cemetery Enclosures, Repair, and Repainting

Walking through a historic Victorian cemetery, one is often struck by the elaborate metalwork surrounding family plots. Wrought and cast iron fences were more than simple property markers during the 19th century; they were profound symbols of grief, status, and lasting remembrance. Today, preserving these intricate historic enclosures requires an understanding of their unique history, careful structural repair, and proper protective maintenance.

1. History of Iron Fencing in Victorian Cemeteries

The Victorian era saw a massive surge in the popularity of ornate ironwork, largely fueled by the Rural Cemetery Movement of the mid-19th century. As cemeteries transformed from crowded churchyards into landscaped, park-like settings, families sought out permanent ways to distinguish their private burial plots.

  • Cast Iron vs. Wrought Iron: It is common to confuse the two, but they have distinct manufacturing histories. Cast iron—poured into molds to create ornate, repetitive decorative motifs, finials, and heavy corner posts—was celebrated for its intricate artistic detail. Wrought iron—manually heated and hammered by blacksmiths into bars, pickets, and scrolls—was valued for its superior tensile strength and flexibility.
  • Symbolism and Status: Elaborate iron fences enclosed grief-stricken family spaces, often featuring Gothic revival motifs, weeping willows, urns, or spear-pointed pickets designed to keep stray livestock and vandals out while establishing an air of solemn architectural dignity.

2. Repairing Historic Iron Enclosures

Over the decades, soil shifting, tree root growth, moisture, and accidental impacts take a heavy toll on historic cemetery ironwork.

  • Addressing Structural Leans and Breaks: Ground movement frequently tilts entire fence panels or causes corner posts to sink. Posts must be carefully plumbed and re-anchored in stable foundations. When cast iron components fracture, they cannot be easily welded like steel because of their high carbon content; instead, they require specialized mechanical pinning, custom-sleeved internal bracing, or specialized low-temperature brazing by experienced conservators. Wrought iron elements, being more malleable, can often be heated and carefully straightened or forge-welded when broken.
  • Preserving Original Fabric: Avoid modern quick-fixes or heavy-handed alterations that compromise the historic integrity of the metal. Every original picket, rail, and decorative finial should be saved and restored whenever structurally possible.

3. Repainting and Protecting Ironwork

Unprotected iron exposed to decades of rain and snow will inevitably succumb to rust. Proper surface preparation and coating are vital to stopping corrosion.

  • Surface Preparation: All flaking paint, active rust, and old failing coatings must be gently removed down to bare metal using hand-scraping, wire-brushing, or needle-scaling.
  • Priming and Painting: Once clean and dry, the iron must be immediately treated with a high-performance, rust-converting primer. For the topcoat, traditional oil-based or modern breathable metal coatings in historic semi-gloss or satin black (or historically accurate dark greens and bronzes) provide long-lasting protection against moisture infiltration while honoring the authentic Victorian aesthetic.

Key Takeaways for Ironwork Preservation

  • Understand the Material: Distinguish between brittle cast iron decorative elements and flexible wrought iron structural bars to determine the correct repair technique.
  • Combat Corrosion Early: Regular inspections, gentle rust removal, and breathable, rust-converting paint systems prevent minor oxidation from turning into structural failure.
  • Professional Conservation: Because historic iron enclosures are fragile and irreplaceable, complex structural realignments and repairs are best handled by preservation professionals.

Repairing Broken Headstones: Structural Repair and Stone Consolidation

Repairing a broken historic headstone is one of the most delicate and rewarding tasks in cemetery conservation. When a marker fractures due to environmental pressure, accidental impact, vandalism, or internal stress, structural intervention is often required to keep the piece intact and legible. However, successful repair goes beyond simply gluing pieces back together; it requires an understanding of stone mechanics, compatibility, and consolidation.

1. Structural Repair: Rejoining Broken Fragments

When a headstone snaps into multiple pieces, piecing it back together requires careful planning and specialized materials.

  • Alignment and Dry-Fitting: Before any adhesive is introduced, fragments must be completely cleaned, dried, and dry-fitted to ensure a precise, flush connection.
  • Choosing the Right Adhesive: Modern epoxies are frequently used to rejoin stone fragments because of their immense tensile strength. Rigid, non-yielding adhesives can cause the stone to shear along a new line right next to the repair if the restored monument gets damaged again by hazards like vandalism, fallen trees, or severe impact.

2. The Role of Stone Consolidation

Before or during structural repairs, conservators frequently encounter stones that are structurally compromised not by a clean break, but by internal decay.

  • Granular Disaggregation (“Sugaring”): Over decades or centuries, weathering, moisture infiltration, and acid rain can dissolve the natural mineral binders holding sandstone, marble, or limestone together. This causes the stone surface to loosen and disintegrate into individual grains—a condition known as sugaring. Attempting to scrub or glue a sugaring stone is impossible because the material itself is falling apart.
  • What Consolidants Do: Stone consolidants (typically ethyl silicate-based treatments) are liquid chemical solutions applied to the weakened stone. The consolidant penetrates the porous, decaying matrix and cures to replace the lost natural binders, effectively re-anchoring the stone grains together from the inside out.
  • The Golden Rule of Consolidation: Consolidants should generally be applied before structural repairs or after biological growth has been safely treated (such as spraying stones undergoing sugaring with a biocide and letting wind and rain clear the residue).

Key Takeaways for Headstone Repairs

  • Prioritize Compatibility: Whether choosing an adhesive, a consolidant, or a mortar patch, ensure the materials allow the stone to breathe and flex naturally.
  • Do No Harm: If a stone is too fragile to support a structural repair, alternative display methods (such as laying the fragments securely on a custom supportive bed) should be considered.
  • Patience and Precision: Rushing a stone repair almost always leads to visible misalignment, trapped moisture pockets, or future structural failure. Take the time to clean, dry, and test-fit every single component.

Resetting Historic Grave Markers: A Guide to Proper Conservation

Resetting a sunken, leaning, or fallen grave marker is one of the most important structural interventions in cemetery preservation. Left unaddressed, unstable monuments pose a severe safety hazard to cemetery visitors, maintenance crews, and local children, while also being vulnerable to cracking or breaking completely when they finally collapse to the ground.

However, resetting historic stones requires a nuanced approach. The technique depends entirely on the design of the marker, using breathable foundations and compatible materials (such as natural hydraulic lime rather than modern Portland cement) to ensure long-term stability.

1. Tablet Markers Without a Base

Standalone tablet markers are single slabs of stone set directly into the earth. Over time, freeze-thaw cycles, soil erosion, and weight cause these markers to sink or lean perilously.

  • The Process: The marker must be carefully excavated, lifted, and cleaned at the base. The underlying soil is compacted, and a stable, level sub-base is established—often using a compacted aggregate bed or a concrete pad cast below the frost line, depending on local soil conditions and stone weight.
  • Setting: The stone is reset plumb (vertically level) to ensure gravity distributes its weight evenly down through the center, preventing future tilting.

2. Tablet Markers with a Socket Base

Many 19th-century markers consist of a vertical tablet fitted directly into a slotted stone base (or “socket”).

  • The Pitfall to Avoid: Historically, many of these joints were packed or poured with lead or sulfur to secure the tablet. When water enters the socket, it gets trapped. Because rigid materials or metals cannot flex or allow moisture to escape, the freezing water expands and can cause the base to fracture.
  • The Proper Fix: When resetting a socketed tablet, clean out all old, failed, and rigid historical infill materials from the slot. Point or repoint the joint using a breathable natural hydraulic lime mortar or appropriate lime putty mix that allows moisture to evaporate safely.

3. Multi-Piece Monuments

Multi-piece monuments—such as obelisks, die-on-base markers, and multi-tier pedestals—rely on gravity, precise alignment, and internal pinning.

  • The Process: Each tier must be systematically disassembled, cleaned, and inventoried. The foundation is leveled and re-stabilized to prevent future differential settling (which causes leaning and shearing).
  • Pins and Bedding: Many historic multi-piece monuments used iron or steel dowels or pins to lock the tiers together. Rusted iron pins should be removed entirely rather than replaced; old pins are taken out, leaving them out and allowing gravity and breathable mortar to do their work. The tiers must be bedded in a matching natural hydraulic lime mortar. Never use modern epoxy or Portland cement to glue heavy tiers together, as it traps moisture and creates irreversible rigidity.

Key Takeaways for Restoration

  • Never use Portland cement: Always use breathable lime-based mortars that match the original material hardness.
  • Prioritize safety: Multi-piece monuments and heavy tablets are extremely dangerous. Always use proper lifting equipment—such as tripods, gantries, and straps—to protect both the worker and the irreplaceable historic stone.

The Foundation of Preservation: Choosing the Right Mortar for Cemetery Restoration

When restoring historic stone monuments, markers, and multi-piece cemetery structures, selecting the correct mortar is just as critical as the cleaning technique. Historic preservation relies on a foundational rule: matching the physical characteristics of the original materials. For decades, however, well-intentioned repairs have caused catastrophic damage because modern, rigid materials were used on historic stone.

A Brief History of Hydraulic Mortars

Long before the invention of modern Portland cement, builders relied on lime-based binders. Ancient Romans famously perfected hydraulic lime by mixing slaked lime with volcanic ash (pozzolans), allowing the mortar to set even in damp conditions or underwater.

By the mid-19th century—the era of many historic American cemeteries—French and British engineers rediscovered natural hydraulic lime (NHL). Produced by burning limestone that naturally contained clay impurities, NHL set through a chemical reaction with water rather than just air-curing. This gave historic masons a strong, durable, yet flexible mortar that could support stone monuments while accommodating natural thermal expansion, shifting, and moisture movement.

The Pros of Using Natural Hydraulic Lime (NHL) in Cemetery Restoration

Natural Hydraulic Lime has become the gold standard for historic masonry and cemetery restoration for several key reasons:

  • Vapor Permeability (Breathability): Historic stones need to “breathe.” NHL mortars allow moisture absorbed by the stone to evaporate harmlessly through the mortar joints rather than getting trapped inside the stone.
  • Flexibility and Movement: Ground freeze, thaw cycles, and soil movement cause historic monuments to shift. NHL remains slightly flexible, absorbing these micro-movements without cracking.
  • Sacrificial Nature: Mortar should always be softer and weaker than the stone it holds together. NHL acts as a sacrificial layer; if stress occurs, the mortar joint gives way rather than fracturing the irreplaceable historic stone.
  • Compatibility: Because historic foundations and stones were originally bedded in lime-rich environments, NHL bonds harmoniously with ancient substrates without introducing harmful chemical reactions.

The Dangers of Portland Cement-Based Mortars

In stark contrast to natural hydraulic lime, modern Portland cement-based mortars have no place in historic cemetery restoration. Using Portland cement on historic stone is often destructive, leading to permanent damage.

  • Extreme Rigidity: Portland cement cures into a hard, brittle, inflexible sheet of concrete. When the ground freezes or monuments settle, the mortar refuses to flex. Instead, the stress transfers directly into the historic stone, causing the stone faces to spall, crack, or break apart.
  • Trapped Moisture: Portland cement is dense and virtually impermeable. Moisture entering the monument cannot escape through the hard cement joints. Instead, moisture is forced to migrate through the stone itself. As trapped water freezes or evaporates, it pushes salts to the surface, causing the stone to erode and crumble from the inside out (spalling and granular disaggregation).
  • Irreversibility: Portland cement forms a bond that is often stronger than the historic stone. If a repair fails or needs to be undone, chipping away hard cement mortar typically destroys the edges of the historic stones it was meant to protect.

Summary

In cemetery conservation, preservation means respecting the age and fragility of the stone. By utilizing Natural Hydraulic Lime, conservators ensure that monuments remain breathable, flexible, and protected for generations to come, avoiding the destructive pitfalls of modern Portland cement.

Preservation Ethics

Do no harm.
“Do no harm” is the ultimate guiding principle of cemetery preservation, establishing that every physical or chemical choice must prioritize the long-term safety and structural integrity of historic monuments. Because historic stone and masonry are fragile, porous, and often weakened by decades or centuries of exposure, any well-intentioned intervention that is poorly chosen or overly aggressive can permanently ruin an irreplaceable artifact.

Adhering to this principle means avoiding destructive materials—such as rigid Portland cements or harsh mechanical tools—that create micro-fractures, trap moisture, or accelerate stone decay. By committing exclusively to fully reversible, compatible, and gentle methods, preservationists ensure that their actions protect the marker for future generations rather than inadvertently causing premature deterioration.

Respect and retain the historic fabric and original material.
Respecting and retaining the historic fabric and original material is a foundational pillar of ethical cemetery preservation. Every historic headstone, hand-carved marker, and piece of surrounding landscape carries physical evidence of the past—from tool marks left by early stonemasons to centuries of natural weathering that tell the story of a monument’s endurance.

Rather than seeking a pristine, brand-new appearance that strips away history, conservation ethics demand that we honor the integrity of the original material. This means prioritizing stabilization and repair over replacement, ensuring that physical interventions are minimal and reversible. By preserving the authentic stone and period-accurate components, we protect the genuine physical link between past generations and our own.

Minimize impact.
Minimizing impact in cemetery preservation means letting physical interventions remain as light, targeted, and non-destructive as possible. Every action taken on a historic marker—whether cleaning, repairing, or resetting—alters the original material to some degree, making restraint a core ethical duty.

This principle requires favoring gentle, non-mechanical methods like soft-bristled brushes and approved chemical treatments over aggressive tools like power washers, sandblasters, or abrasive wheels that wear away historical tool marks and stone faces. By treating stabilization and repair as surgical interventions rather than total overhauls, preservationists ensure that future generations can continue to study and connect with the authentic fabric of the site without modern interference masking its true history.

Be authentic.
Being authentic in cemetery restoration means honoring the true age, construction, and materials of a historic monument without resorting to deceptive shortcuts or modern fabrications. It requires that any necessary repairs or mortar matches remain honest about what is old and what is new, avoiding artificial aging or cosmetic overhauls that trick the eye but compromise historical integrity.

This commitment to authenticity extends to the methods and materials used on-site, rejecting modern, rigid Portland cements in favor of breathable, period-accurate lime-based mortars that behave compatibly with historic stone. By preserving the genuine character and refusing to paint, coat, or disguise a marker into something it never was, preservationists ensure that every headstone tells an unvarnished, truthful account of its history.

Document all activities.
Documenting all activities in cemetery restoration is a vital ethical duty that ensures every action taken on a historic site is transparent, accountable, and preserved for the future. Thorough documentation acts as a permanent paper and digital trail, recording the exact condition of a monument before intervention, the specific materials and methods used during treatment, and its final appearance afterward.

This meticulous record-keeping prevents future caretakers from having to guess what previous restorations entailed and protects the historical integrity of the site. By capturing detailed field notes, photographs, and mapping data, preservationists maintain a responsible history of stewardship, ensuring that the choices made today can be understood, evaluated, and respected by the generations that follow.

Maintain and protect the resource.
Maintaining and protecting the resource in cemetery restoration means recognizing that historic burial grounds are finite, irreplaceable cultural landscapes that require ongoing, long-term stewardship. Preservation goes beyond individual headstones to safeguard the entire site—its fragile terrain, boundary markers, and historical layout—ensuring that the landscape is shielded from neglect, vandalism, and inappropriate modern alterations.

This duty of protection involves proactive maintenance strategies, such as managing encroaching vegetation responsibly, stabilizing leaning stones before failure occurs, and defending the perimeter against degradation. By treating the cemetery as an enduring historical archive, preservationists ensure that these sacred resting places survive intact for future generations to study, visit, and respect.
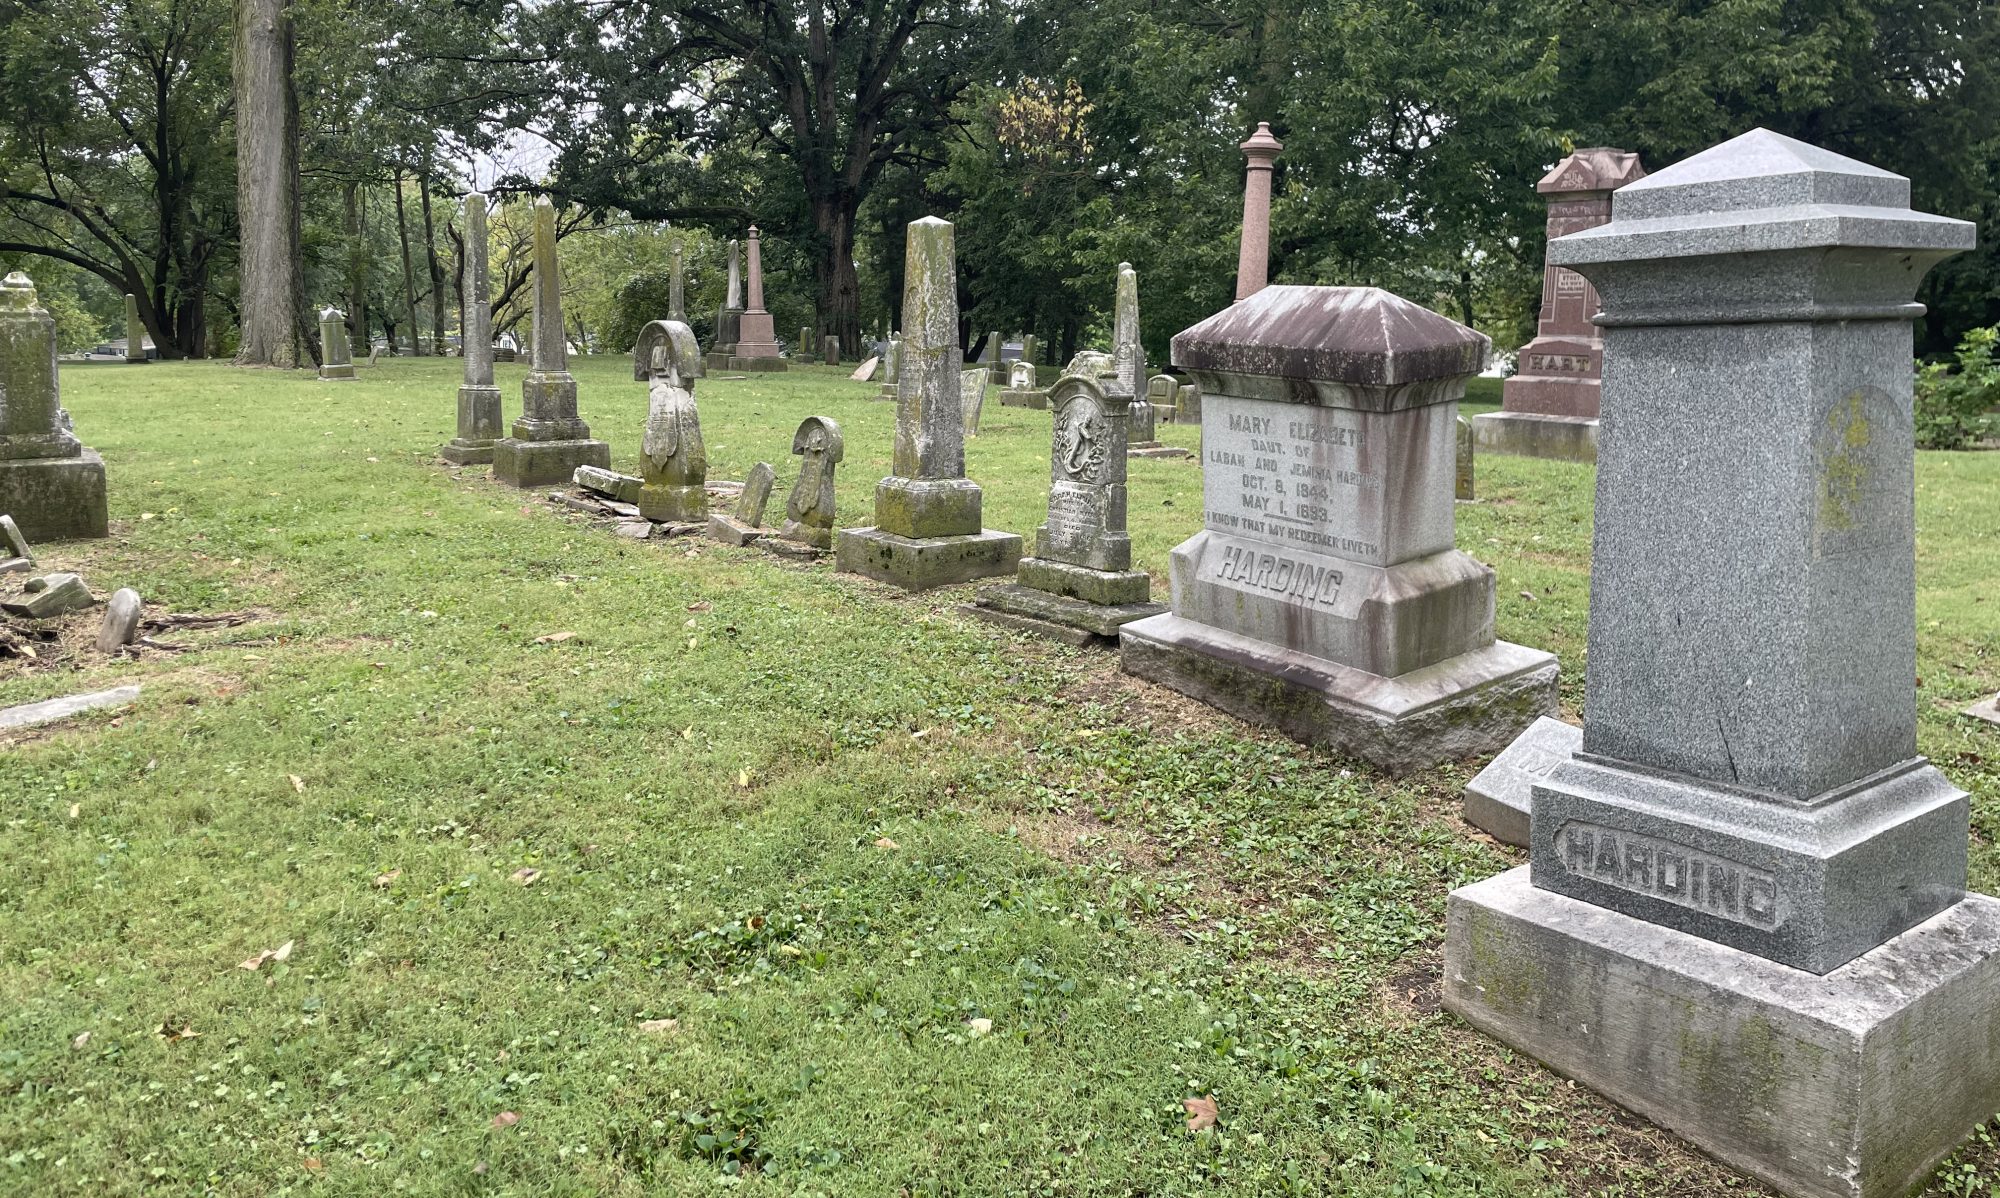
Cleaning Headstones: A Guide to Best Practices

Marker cleaned with D/2 Biological Solution. L to R: before, immediately after cleaning, three months after cleaning.

Cleaning a grave marker depends entirely on its condition and what needs to be removed. Above all, follow the golden rule of preservation: Do no harm. If cleaning threatens to damage the marker, stop.

Before beginning, identify your goals and the specific issues you are addressing.

Goals & Causes

  • Primary Goals: Improve readability and conserve the artifact.
  • Common Issues: Soiling, copper/ferrous metal staining, biological growth, gypsum crust, and graffiti.

Tools & Equipment

  • Use: Soft Tampico natural bristle brushes and plenty of clean water for thorough rinsing. A 2 gallon pump sprayer is good for wetting and rinsing the marker. A standard spray bottle is sufficient for the cleaning chemical.
  • Never Use: Power tools like pressure washers, abrasive pads, or nylon wheel brushes on a drill.

Treating Specific Cleaning Issues

1. Biological Growth (Lichen, Moss, Algae)

Biological growth is the leading cause of reduced readability. Lichen roots penetrate the stone substrate, causing micro-cracks that expand during freeze-thaw cycles. Removing growth protects the stone regardless of readability.

  • Standard Treatment: A soft Tampico natural bristle brush and plain water.
  • Biocides: For stubborn growth, use a biocidal cleaner like D/2 Biological Solution, Wet & Forget, or Revive by Prosoco. These products continue cleaning long after the initial scrub and rinse.
  • Sugaring Markers: If a stone is experiencing granular disaggregation (“sugaring”), scrubbing is dangerous and will strip away material. Instead, spray with a biocidal cleaner and let wind and rain naturally wash away the dead growth before any consolidation treatment.

More about biocidal cleaners.

2. Soiling

Biocidal cleaners have little effect on standard soil. Often, plain water is enough. For tougher dirt, use Orvus WA paste. If biological growth is also present, a biocide can be used in tandem.

3. Ferrous Metal (Rust) Staining

Historic monuments were often held together with internal iron pins. As these rust and expand, they cause cracking, breaking, and rust stains.

  • Treatment: Ferrous Stain Remover by Prosoco or a chemical poultice to lighten the stain (complete removal is not guaranteed).

4. Copper Staining

Oxidized bronze plaques often create green stains as rainwater carries runoff down the face of the stone.

  • Treatment: A chemical poultice is the best approach, though complete removal cannot be guaranteed.

5. Gypsum Crust/Carbon Staining (Soot)

Found mostly in urban environments, gypsum crust is carbon buildup from vehicle and factory emissions.

  • Treatment: Intermittent water misting. Gently mist the stone for several seconds, pause for several minutes, and repeat for 6 to 24 hours until the crust absorbs enough moisture to separate safely from the stone.

6. Graffiti/Vandalism

Graffiti must be addressed immediately to prevent permanent staining, using specific chemical treatments based on the paint type. This is not a DIY project—contact a professional restoration specialist right away.

7. Minor Stains

Uncommon issues like bird droppings, berry stains, or walnut juice can be treated with Vulpex soap or a poultice.

What Not To Do

  • Never use bleach, acids or metal tools of any kind.
  • Never use pressure washers or sand blasters.
  • Never use nylon wheel brushes on a drill (such as Nyalox brushes).

Nyalox Wheel Brushes
These rotary brushes—historically popularized by some state preservation classes—act like sandpaper on historic stone. They strip away the protective exterior patina that seals the pores, leave behind visible vertical and horizontal scratch lines, and ultimately accelerate weathering and destruction on 150-year-old markers. Always insist on safe, traditional hand-cleaning methods.

This is an issue worth repeating: at least two active contractors in Indiana continue to use Nyalox abrasive wheel brushes on drills, despite being shown the evidence and warned that the method is entirely inappropriate. Because this method takes significantly longer than proper hand-cleaning, it artificially inflates project costs—meaning more money for the contractor at the expense of the cemetery or family footing the bill.

The Problem with Nyalox Brushes

Originally designed to strip paint from metal, Nyalox abrasive wheel brushes act like sandpaper on historic stone. They completely strip away the protective exterior patina that has taken decades to form. Once this natural barrier is removed, the vulnerable stone underneath is fully exposed to the elements, accelerating weather-driven destruction.

A 150 year old grave marker shouldn’t look like it was just carved and set. it should look 150 years old and well card for. Don’t pay someone to damage your markers.

The white substance in these three images is marble dust removed from the stone with Nyalox brushes. In the third image they did such a poor job of rinsing the marker the base is streaked with marble dust.

This marker was cleaned a few years prior to this photo. As the biological growth returned you can see the vertical and horizontal lines scratched into the marble with Nyalox. You can’t see these scratches unless you use a magnifying glass when the marker is initially cleaned. but the damage becomes obvious after time passes and the contractor has spent the money.

In 2015 I conducted a study to document the damage caused by Nyalox. This image shows my fingers before and after polishing the marker. Polishing is the second phase these contractors use. It’s done by using a Nyalox with a finer grit on a dry stone. It also doubles the time they have to spend on each marker which further increases the cost.

You don’t have to hire Stone Revival Historical Preservation, but please don’t hire contractors that use proven destructive methods, aren’t concerned about it and have several excuses ready to go. There is never a legitimate excuse to use inappropriate methods.

Mount Jackson Cemetery

Stone Revival Historical Preservation is proud to announce that we will be working in conjunction with the Wayne Township Trustee (Indianapolis) to lead a volunteer restoration project of Mount Jackson Cemetery.

This will be a multi-year project and will require thousands of hours of volunteer time. There are approximately 8,000 grave markers here. If you are interested in participating in this project visit the Mount Jackson Cemetery web sit for more information. No experience is required. A professional will be on site for each work day to answer questions and train new volunteers.

Visit the cemetery web site at http://www.mountjacksoncemetery.net